JavaScript in the browser console
In this tutorial, I demonstrate a few basics of the JavaScript programming language using the web browser’s JavaScript console.
The secret language of web browsers
A web browser is a computer program that allows you to view web pages and follow hyperlinks from one page to the next. You might be familiar with a few big names in the web browser scene: Safari, Google Chrome, Firefox, Edge. The web browser is doubtlessly one of the most important inventions in recent history; they are installed ubiquitously on all kinds of computers, from smart phones to game consoles to laptops. Chances are you’re using a web browser right now to view this tutorial right now.
Web browsers are designed to display content formatted with a language called HTML (HyperText Markup Language). Almost all web browsers also understand a programming language called JavaScript. Invented in the 1990s as one of several competing ways to embed simple logic for data verification and interactivity in web pages, JavaScript today is widely used by programmers of all stripes, not just in web browsers but in web servers, desktop applications, video games and even microcontrollers.
For now, though, we’ll focus on JavaScript in the browser. Normally, you’d write JavaScript as part of a web site, as a separate file that you upload to a web server. But almost all browsers allow you to type JavaScript code directly into the browser, using something called the “console.” Most programmers use the console as a tool to help them “debug” (i.e., investigate and fix problems in) their code, but you can also use the console as a way to just play around with JavaScript and get a feel for how it works. Which is what we’re going to use it for.
Bringing up the console
To begin, open a web browser like Safari, Firefox, or Chrome on a desktop computer (this probably won’t work on a mobile device or tablet). To make things simpler, we want to enter the following URL in the location bar:
about:blank
This should show a blank browser tab (i.e., no visible content). If that doesn’t work, try the following URL, which should have the same effect:
data:text/html,
(The trailing comma is important!) After you do this, you’ll need to open the
web console. How to do this differs from one browser to another, and may also
be different depending on your operating system! I use Firefox on macOS and
open the web console by going to Tools > Web Developer > Web Console (not
“Browser console” which is, unhelpfully, a different thing). In Google Chrome,
go to View > Developer > JavaScript Console; in Safari, Develop > Show
JavaScript Console (you’ll need to enable this menu by enabling “Show Develop
menu in Menu Bar” in Safari’s preferences first). You should see something like
this:
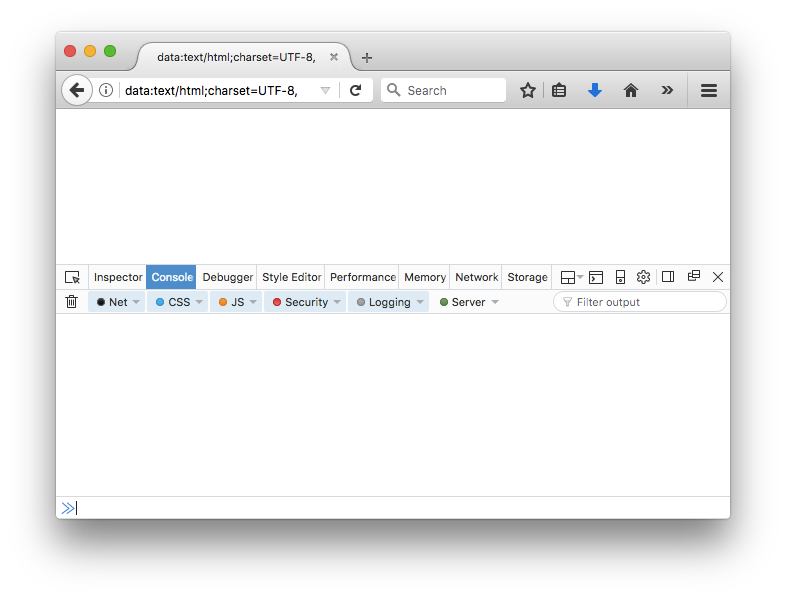
Again, this will look a bit different depending on the browser you’re using, but the concept is the same. You’re seeing an empty web page with the JavaScript console open. The console is there on the bottom of the window; the web page itself is above. You’ll be typing JavaScript code into the lower part, which will also show the results of evaluating that code. If your code makes changes to the web page (which is blank right now, but you can change that with code!), they’ll be displayed in the panel above.
Read, evaluate, print, loop
Let’s start with a very high-level description of how computer programming works. When you’re writing a computer program, you’re describing to the computer what you want, and then asking the computer to figure that thing out for you. Your description of what you want is called an expression. The process that the computer uses to turn your expression into whatever that expression means is called evaluation.
Think of a science fiction movie where a character asks the computer, out loud, “What’s the square root of nine billion?” or “How many people older than 50 live in Paris, France?” Those are examples of expressions. The process that the computer uses to transform those expressions into a response is evaluation.
When the process of evaluation is complete, you’re left with a single “value”. Think of it schematically like so:
Expression → Evaluation → Value
What makes computer programs powerful is that they make it possible to write very precise and sophisticated expressions. And importantly, you can embed the results of evaluating one expression inside of another expression, or save the results of evaluating an expression for later in your program.
Unfortunately, computers can’t understand and intuit your desires simply from a verbal description. That’s why we need computer programming languages: to give us a way to write expressions in a way that the computer can understand. Because programming languages are designed to be precise, they can also be persnickety (and frustrating). And every programming language is different. It’s tricky, but worth it.
Arithmetic expressions
Let’s start with simple arithmetic expressions. The way that you write
arithmetic expressions in JavaScript is very similar to the way that you write
arithmetic expressions in, say, grade school arithmetic, or algebra. In the
example below, 3 + 5 is the expression. In the interactive interpreter, you can
tell JavaScript to evaluate the expression and display its value simply by typing
in the expression into the input section of the console.
≫ 3 + 5
⬅︎ 8
(In this document, the expression you type follows ≫ and the console’s
response, i.e., the resulting value, follows ⬅︎ .)
For historical reasons, the way that some operators look in JavaScript (and many other programming languages) is a little bit different from their common notation in arithmetic and algebra:
| Operation | JavaScript operator |
|---|---|
| addition | + |
| subtraction | - |
| multiplication | * |
| division | / |
Arithmetic expressions in JavaScript can be much more sophisticated than this, of course. We won’t go over all of the details right now, but one thing you should know immediately is that JavaScript arithmetic operations are evaluated using the typical order of operations, which you can override with parentheses:
≫ 4 + 5 * 6
⬅︎ 34

≫ (4 + 5) * 6
⬅︎ 54
You can write arithmetic expressions with or without spaces between the numbers and the operators (but usually it’s considered better style to include spaces):
≫ 10+20+30
⬅︎ 60
Expressions in JavaScript can also be very simple. In fact, a number on its own is its own expression, which JavaScript evaluates to that number itself:
≫ 19
⬅︎ 19
If you write an expression that JavaScript doesn’t understand, then you’ll get an error. Here’s what that looks like:
≫ 20 19 + SyntaxError: missing ; before statement
You can use both integers and numbers with decimal points (real numbers, sometimes called floating-point numbers). For example, dividing one number by another results in such a number:
≫ 17 / 2
⬅︎ 8.5
Actually, any time one of the operands in a mathematical expression is a floating-point number, the result will be a floating-point number (and JavaScript actually represents both kinds of numbers in the same way under the hood):
≫ 8 * 2.1
⬅︎ 16.8
Expressions of inequality
You can also ask JavaScript whether two expressions evaluate to the same value, or
if one expression evaluates to a value greater than another expression, using a
similar familiar syntax. When evaluating such expressions, JavaScript will return
one of two special values: either true or false.
The == operator compares the expression on its left side to the expression on
its right side. It evaluates to true if the values are equal, and false if
they’re not equal.
≫ 3 * 5 == 9 + 6
⬅︎ true

≫ 20 == 7 * 3
⬅︎ false
The < operator compares the expression on its left side to the expression on
its right side, evaluating to true if the left-side expression is less than the
right-side expression, false otherwise. The > does the same thing, except
checking to see if the left-side expression is greater than the right-side
expression:
≫ 17 < 18
⬅︎ true

≫ 17 > 18
⬅︎ false
The >= and <= operators translate to “greater than or equal” and “lesser than
or equal,” respectively:
≫ 22 >= 22
⬅︎ true

≫ 22 <= 22
⬅︎ true
Make sure to get the order of the angle bracket and the equal sign right!
≫ 22 =< 22
⬅︎ ReferenceError: invalid assignment left-hand side [Learn More]
≫ 22 => 22
⬅︎ SyntaxError: invalid arrow-function arguments (parentheses around the arrow-function may help)
Built-in functions: Math.random()
Of course, JavaScript can do a lot more than just basic calculator math! The language comes with built-in objects and functions that you can include in your code to perform simple computational tasks. These are among the tools JavaScript gives you to make useful programs. We’ll talk about a handful of these below, but you can see the full list here.
A “function” is a bit of pre-written code that performs some tasks and evaluates to a value. To make use of a function, you “call” or “run” it by typing its name, followed by a pair of parentheses, into your code. Later on, you’ll learn how to write your own functions, but for now we’ll just use a few that JavaScript defines for us.
The built-in function Math.random() evaluates to a random real number between zero and one. Call it by typing its name into the console:
≫ Math.random()
⬅︎ 0.4805643133576173
(Of course, you’ll see a different randomly-selected number.) Run this line a few times to get different results! An easy way to simulate a coin flip is to ask JavaScript if the result of this function is greater than 0.5:
≫ Math.random() > 0.5
⬅︎ true

≫ Math.random() > 0.5
⬅︎ false
Half the time, you’ll get true (heads!) and half the time false (tails!).
A six-sided die with Math.floor()
We can use what we’ve discussed so far to write some code to simulate rolling
a six-sided
die. What we
want to do is write an expression that evaluates, at random, to a number
between one and six (inclusive). We already know about the Math.random()
function, which returns a random real number between zero and one. To get a
random number ranging up to six, we can just multiply the value of
Math.random() by six:
≫ Math.random() * 6
⬅︎ 4.658931071787378
Run this a few times to get a sense of the range of values it returns. This is a good first step, but it’s not quite what we want, a simulated roll of a six-sided die), since it has a fractional part. Also, if you run the function enough times, you’ll notice that the number before the fractional part varies from zero to five, but never reaches six. (Think through for a second why this is the case!)
So, we have two problems to solve in the implementation of our six-sided die simulation. The first is that the expression as we’ve written it includes a fractional part. The second is that the range isn’t quite right: we want numbers from one to six, but the expression right now gives us zero through five.
To fix the first problem, we need to find some way to drop the fractional part
of a number. I’m going to tell you how to do this, but if I’m not around the
next time you have a problem like this, you might turn to a web search; try
something like drop fractional part of number in javascript. Usually you’ll
find a thread like this with some
pointers and hopefully some example code!
JavaScript actually comes with a built-in function for dropping the fractional
part of a number (i.e., rounding it down). The function is called
Math.floor(). This function works a little bit differently from
Math.random() in that it doesn’t just come up with a number out of nowhere,
but performs an operation on a number. The terminology for this is that the
function takes an argument or parameter. When a function takes a parameter,
you put the expression whose result the function should operate on in between
the parentheses, like so:
≫ Math.floor(17 / 2)
⬅︎ 8
As you can see, when you put an expression between the parentheses, JavaScript evaluates the expression and then provides it to the function as a parameter. The function then evaluates to the result of the operation it’s designed to perform.
Keeping in mind that values are themselves expressions that evaluate to that
value, You can use Math.floor() to find the rounded-down equivalent of an arbitrary
number:
≫ Math.floor(1234.5678)
⬅︎ 1234
Now, the tricky part: how do we take the random number returned from
Math.random() * 6 and find the rounded-down equivalent? Here’s how: put the
entire expression inside the parentheses of Math.floor().
≫ Math.floor(Math.random() * 6)
⬅︎ 3
Hey, nice! We’re most of the way there. Run this function a few times to see what the result looks like. (In most browsers, you can press the “up” key to “scroll through” previous expressions. Do this to save yourself some typing!)
You’ll see that the values are still ranging from zero to five. To fix this problem, we’ll take the entire expression and add one to it:
≫ Math.floor(Math.random() * 6) + 1
⬅︎ 4
EXERCISE: Work through why the
* 6part of this expression has to be inside the parentheses, and why+ 1has to be outside. If you’re having trouble reasoning about this, try writing it down on a piece of paper and working through the steps that JavaScript must be taking to evaluate this expression.
Learning about programming
By the way, there’s no reason you should have known that there was a function
called Math.floor() that performs the operation that this particular function
performs. It’s not obvious from first principles that such a function should
exist. The task of learning how to program a computer is, in fact, the very
task of learning about what a particular programming language looks like and
what facilities it provides. So don’t worry if something like Math.floor()
seems unobvious, because it absolutely is.
Even expert programmers don’t have an encyclopedic knowledge of the programming languages they use; writing a computer program is always about skimming through reference material to find functions and structures that can be cobbled together to perform a particular task.
Alert!
Functions don’t always evaluate to a useful value. Some functions only exist in
order to perform a particular task. The alert()
function is one of these. Try
typing the following into the console:
alert("Hello, world!")
This should display a modal dialog
box that invites you to click “OK”
(or something similar; exactly what this window looks like depends on your
browser). Making this window appear is the purpose of the alert() function.
When you click “OK,” you’ll notice that the word undefined appears in the
console. The value undefined is a special value in JavaScript that means
“nothing in particular,” which is what the alert() function evaluates to.
By the way, the expression between the parentheses of alert() in the example
above—beginning and ending with double quotes—is called a string literal.
A string literal is one way of defining a kind of value called a string,
which is used in JavaScript (and many other programming languages) to represent
text. (Computer programs are made of text, but also often work on text, the
same way that a calculator works on numbers. A string literal is how to tell
JavaScript that some text in your expression is data, and not part of the
code of the expression.)
The alert() function will also helpfully take a value that isn’t a string as
a paramenter. For example, to display a pop-up window with the result of our
six-sided dice simulation:
alert(Math.floor(Math.random() * 6) + 1)
Variables
You can save the result of evaluating an expression for later using the =
operator (called the “assignment operator”) and the let keyword. On the
left-hand side of the =, write a word that you’d like to use to refer to the
value of the expression, and on the right-hand side, write the expression
itself. After you’ve assigned a value like this, whenever you include that word
in your JavaScript code, it will evaluate to the value you assigned to it
earlier. Like so:
≫ let x = (4 + 5) * 6
⬅︎ undefined
≫ x
⬅︎ 54
In this case, the result of evaluating the expression (4 + 5) * 6 is assigned
to the variable x. Now, whenever you use the variable x in your program, it
“stands in” for the result of the expression that you assigned to it.
Note that the line with let and = is itself an expression, but the
expression of assigning a value to a variable always evaluates to undefined.
(If that sentence doesn’t make sense, don’t worry—it’s a very subtle point.
You can just ignore the undefined result of the assignment operator.) In the
second expression, we just typed x into the console. This is the equivalent
of asking JavaScript, “Hey, remember when I told you about a variable named
x? Can you tell me what’s in there now?”
NOTE: The keyword
varis sometimes used instead oflet. For our purposes, the two are identical, though there is an important difference. For now, if you’re looking at other programming tutorials and you seevar, just know that you can almost certainly use theletkeyword instead ofvarwithout adversely affecting how your program works.
Now, whenever you use the variable x in your program, it “stands in” for the result of the expression that you assigned to it.
≫ x / 6
⬅︎ 9
You can create as many variables as you want!
≫ another_variable = (x + 2) * 4
⬅︎ 224
Variable names must begin with a letter, an underscore, or a dollar sign ($);
after the first character, you can also use numbers. Variable names are
case-sensitive (i.e., apple is a different variable name from Apple). In
most browsers, you can also use non-ASCII characters (i.e., letters and symbols
not commonly used in English) in variable names. This document has
details, but for
example, this works fine:
≫ let 猫 = 1234
⬅︎ undefined
≫ 猫 + 4321
⬅︎ 5555
or
≫ let 고양이 = 1111
⬅︎ undefined
≫ 고양이 + 123
⬅︎ 1234
If you attempt to use a the name of a variable that you haven’t defined in the notebook, JavaScript will raise an error:
≫ voldemort
⬅︎ ReferenceError: voldemort is not defined
If you assign a value to a variable, and then assign a value to it again, the
previous value of the variable will be overwritten. However, if you try to use
the let keyword twice with the same variable name, JavaScript shows an error:
≫ let another_variable = 4
⬅︎ SyntaxError: redeclaration of let another_variable
What are variables even for?
It’s not entirely clear at first why you would even need variables. Why tell JavaScript to store a value for later, instead of just writing a longer expression? One use of variables is to cut down on repetition when you have one value that you want to use in multiple places. Let’s say that you had a number of prices for items in US dollars and you wanted to convert them all to Euros. For this, you could define the conversion rate (0.84 as of this writing) in one variable, and use it in all subsequent calculations. When the conversion rate changes, you just have to update the corresponding value in one place, rather than in each place that it occurs:
≫ let convRate = 0.84;
⬅︎ undefined
≫ 19.99 * convRate
⬅︎ 16.7916
≫ 159.95 * convRate
⬅︎ 134.35799999999998
Another reason for using variables is to make it easier to read and understand long, complex expressions. For example, the expression that we wrote earlier to show a modal dialog with a simulated six-sided die roll is fairly complex:
alert(Math.floor(Math.random() * 6) + 1)
We could break this up into a sequence of variable assignments to make it a little bit easier to read:
let randomValue = Math.random();
let scaledUp = randomValue * 6;
let noFraction = Math.floor(scaledUp);
let dieRoll = noFraction + 1;
alert(dieRoll);
Copy and paste that entire sequence of expressions into the console and execute it. You should see the same result as what you saw with the single expression version. I’ll leave it up to you to decide whether or not this is more readable than the version where everything happens in the same expression. But some programmers prefer making each step of the process explicit and naming the resulting values.
Computer programs
By the way, the sequence of expressions written in the last example is an example of a computer program: a list of things for the computer to do. Technically, a “program” can consist of a single expression, but most computer programs consist of several (and sometimes many thousands or even millions).
When JavaScript encounters such a list, it looks at the first item in the list, evalutes it, and continues until it reaches the last item. This process is called “running” or ‘executing” the program. (There are ways to get JavaScript to skip around in the execution, which are very helpful and which we’ll discuss later). Individual instructions in the list, like assigning a value to a variable, are called statements.
In the example above, the program was just a list of lines of code that you
pasted into the console. Usually, however, a computer program is stored in a
separate file (JavaScript programs usually have a file extension of .js)
which is loaded into the browser via various mechanisms, like the HTML
script
tag.
Another thing to note in the above example: each line of the program ends in a
semicolon (;). What’s going on with that? Well, when executing a program,
JavaScript usually considers each line to be a separate statement. It’s
technically possible, however, to have two statements on the same line,
separated by semicolons, like so:
let abc = 123; let efg = 234
The semicolon signals to JavaScript that the line isn’t just one big expression; it’s two statements, that should be executed separately. By convention, JavaScript programmers include the semicolon at the end of the line even when there’s only one statement on the line. There are good reasons for doing this but mostly it’s just done out of a sense of tradition. (Many of the programming languages that JavaScript’s design is based on, like C and Java do in fact require the semicolon at the end of each line.)
Built-in variables and properties
JavaScript also provides some built-in variables. These variables are always available to you; you don’t have to define them. The built-in variables will differ depending on where you’re running JavaScript (e.g., in the browser, on the command line, in a particular framework, etc.; more about this below); the variables I’m going to show you below are specifically available when you’re running JavaScript in the browser.
NOTE: Technically these are “properties” of built-in “objects,” but I feel okay with calling them “variables” for the purpose of this tutorial.
For example, there’s a built-in variable navigator.userAgent that gives you
information about the browser you’re using:
≫ navigator.userAgent
⬅︎ "Mozilla/5.0 (Macintosh; Intel Mac OS X 10.11; rv:55.0) Gecko/20100101 Firefox/55.0"
And the built-in variables window.innerWidth and window.innerHeight tell
you how many pixels wide your browser window is (respectively):
≫ window.innerWidth
⬅︎ 693
≫ window.innerHeight
⬅︎ 202
Note that your browser will keep these variables up-to-date: try resizing your browser window and checking the value of those variables again.
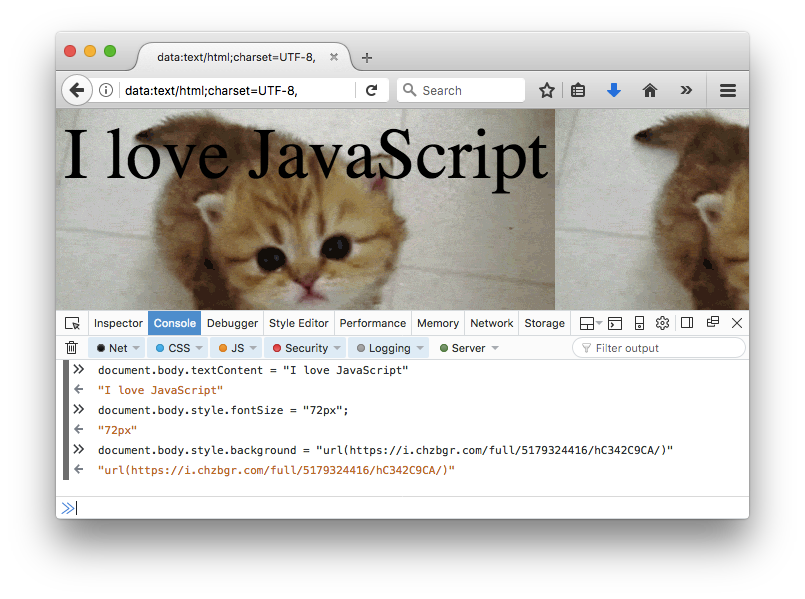
Some of these variables can be overwritten (i.e., you can assign a new value
to them). Notably, the variable document.body.textContent corresponds to the
text visible in the body of the document in the window. The document in our
window is blank (because we specifically chose to load a blank document when we
started this tutorial!). But you can put some text into the body of the
document by assigning a value to this variable:
≫ document.body.textContent = "I love JavaScript"
⬅︎ "I love JavaScript"
The text of the document should change to I love JavaScript as soon as you
execute this assignment.
A few other fun built-in variables: document.body.style.fontSize sets the
size of the font that the text in the body of the document is displayed in. You
can set it by assigning a string value with (for example) a number followed by
px (this sets the size of the font measured in pixels):
≫ document.body.style.fontSize = "72px";
⬅︎ "72px"
The format of 72px is a CSS length
value. If you’re
familiar with CSS, you’ll
recognize the fontSize identifier as being similar to the CSS font-size
property, and in fact web browsers make it easy to change the CSS styles of
HTML elements in the document body. As another example, the variable
document.body.style.background allows you to set the background
of the document body. Let’s use this
gif of a kitten:
≫ document.body.style.background = "url(https://i.chzbgr.com/full/5179324416/hC342C9CA/)"
After running all of these statements, your browser window should look like this:
Next steps
This tutorial was designed to get you a little bit familiar with JavaScript while showing you how to use the JavaScript console that comes for free with pretty much every browser. Becoming familiar with the console is important not just because it’s a helpful tool for debugging and experimentation, but because many more advanced programming tutorials assume familiarity with the concept of read-eval-print-loop style interfaces.
But you’re not likely to do a lot of actual work in the JavaScript console; it’s not really where you write JavaScript programs. Most of the time, browser-based JavaScript applications make use of standalone files that accompany web pages. This JavaScript basics tutorial from MDN takes you through the process of working with such a setup.
More serious JavaScript development usually takes place with the help of a framework, which is a collection of pre-defined functions and other bits of code designed to make particular tasks easier. React is a popular framework for building web interfaces; D3.js is a popular framework for making data visualizations. The framework used in the remainder of the tutorials on this site is p5.js, which makes it easy to build interactive visual applications. Here’s a partial list of other interesting JavaScript frameworks and libraries.
Learning something new always involves approaching the topic from multiple different angles. Programming is no different. Even programming experts are constantly learning new things about their own craft. What’s obvious and quotidian to one programmer is bizarre and avant-garde to the next. As such, if you want to become a skilled and literate programmer, you’ll be better off not just focusing on one tutorial or one programming task. Here are a few other tutorials that might be of interest to you:
- MDN’s “Getting Started with the Web” is a well-paced and generous tutorial on all aspects of web development, including JavaScript.
- Haverbeke’s Eloquent JavaScript is just that. For those of you who learn best from systematic, bottom-up approaches, this book is highly recommended; and those who learn best by example will be served by looking to this book for clear explanations of the underlying logic of JavaScript when you need them.
- Getting Started with p5.js is the JavaScript version of Reas and Fry’s classic Getting Started with Processing. Recommended for learning more about the p5.js framework and about interactive programming in general.